WPILibrary Overview
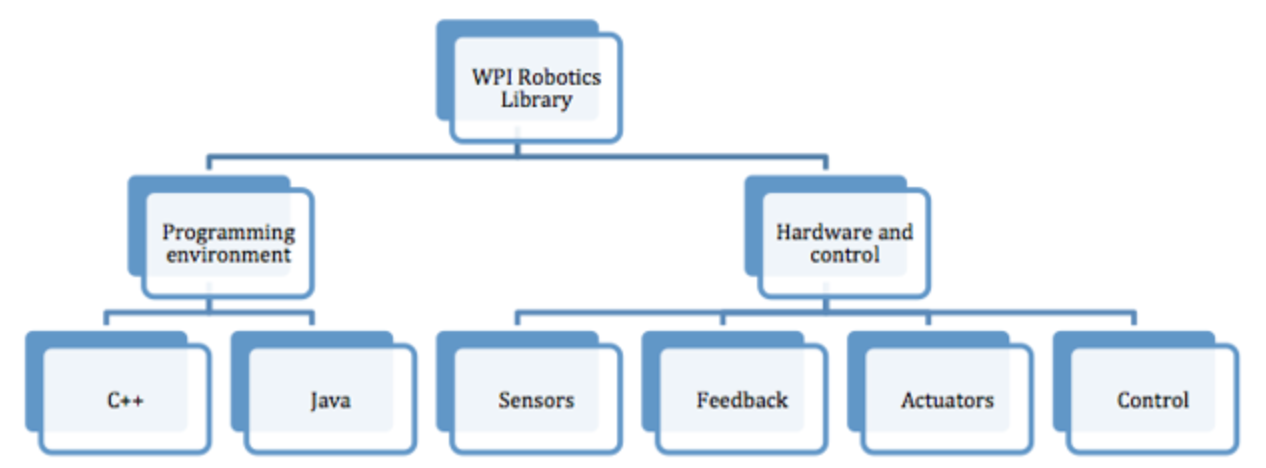
WPILib simplifies the effort of controlling robot functions. WPILib was developed at Worcester Polytechnic Institute. The WPI Robotics library (WPILib) is a set of software classes that interfaces with the hardware and software in common FRC robots' control systems. There are classes to handle sensors, motors, the driver station, and a number of other utility functions such as timing and field management.
Note: The Python library RobotPy is also available via FRC Team 294.
WPILib provides base classes such as Iterative Robot for robot programming. For Spartronics, we use Command-base robot model that WPILib offers for creating our robot. It provides built in support for making it easy to design our robot, its subsystems, and control interactions between the robot and the operator interface. See more in Command Based Programming.
roboRIO
Introduced in 2015 competition season, NI roboRIO is National Instrument's reconfigurable I/O controller built for student robotics teams, and is included in rookie team's kit of parts. The roboRIO adds robot-oriented I/O such as CAN and PWM. The roboRIO runs NI Linux Real-Time OS.
roboRIO and Java Development Toolkit
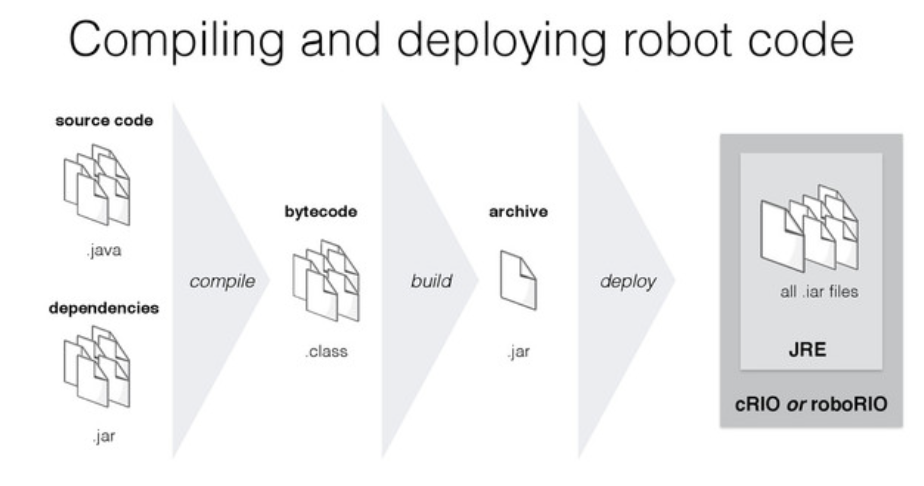
Running robot Java programs requires the Java runtime to be installed on the roboRIO. This can be done using the FRC Java Installer application. The application itself uses java, so Java 8 must be installed on the development system to use the installer. See installation instructions.
Note: Whenever a new image is installed on the roboRIO (either when initially setting it up or later if the image is updated or reinstalled) the Java runtime must be replaced.
Java and C++ programming utilize Eclipse as a development environment. The FRC specific tools for the chosen language are installed as Eclipse plugins. See installation instructions for setting up Eclipse development environment.
Note: to deploy the compiled java code, your computer must be connected to the robot's network.
WPILibJ
The WPI Robotics library (WPILibJ) is a set of Java classes that interfaces to the hardware in the FRC control system and your robot. See online documentation.
Autonomous vs. TeleOp
Robot.java class and methods control robot's autonomous and teleop operations.
import edu.wpi.first.wpilibj.IterativeRobot;

/*
 * The JVM is configured to automatically run this class, and to call the
 * functions corresponding to each mode, as described in the IterativeRobot
 * documentation. If you change the name of this class or the package after
 * creating this project, you must also update the manifest file in the
 * resource directory.
 */
public class Robot extends IterativeRobot {

    public static final ExampleSubsystem exampleSubsystem = new ExampleSubsystem();
    public static OI oi;

    Command autonomousCommand;
    SendableChooser chooser;

    /*
     * This function is run when the robot is first powered on and should be
     * used for any initialization code.
     */
    public void robotInit() {
        oi = new OI();
        chooser = new SendableChooser();
        chooser.addDefault("Default Auto", new ExampleCommand());
        SmartDashboard.putData("Auto mode", chooser);
    }

    /*
     * This function is called once each time the robot enters disabled mode.
     * You can use it to reset any subsystem information you want to clear when
     * the robot is disabled.
     */
    public void disabledInit(){

    }

    /*
     * Periodic code for disabled mode goes here. You can use it to update
     * internal values while the robot is not enabled.
     */
    public void disabledPeriodic() {
        Scheduler.getInstance().run();
    }

    /*
     * This autonomous (along with the chooser code above) shows how to select
     * between different autonomous modes using the dashboard. The
     * sendable chooser code works with the Java SmartDashboard.
     */
    public void autonomousInit() {
        autonomousCommand = (Command) chooser.getSelected();

        // schedule the autonomous command (example)
        if (autonomousCommand != null) autonomousCommand.start();
    }

    /*
     * This function is called periodically during autonomous
     */
    public void autonomousPeriodic() {
        Scheduler.getInstance().run();
    }

    /*
     * This code is called once each time the robot begins teleoperated mode
     */
    public void teleopInit() {
        // This makes sure that the autonomous stops running when
        // teleop starts running.
        if (autonomousCommand != null) autonomousCommand.cancel();
    }

    /*
     * This function is called periodically during operator control
     */
    public void teleopPeriodic() {
        Scheduler.getInstance().run();
    }

    /*
     * This function is called periodically during test mode
     */
    public void testPeriodic() {
        LiveWindow.run();
    }
}
RobotDrive
WPILib provides a RobotDrive object that handles most cases of driving the robot either in autonomous or teleop modes. It is created with either two or four speed controller objects. There are methods to drive with either Tank, Arcade, or Mecanum modes with variable inputs or with Joystick objects as parameters.
- Arcade Drive: single joystick is used for driving. The X-axis is selected by default for the turn axis and the Y-axis is selected for the speed axis.
- Tank Drive: tank steering using two joysticks for driving.
- Mecanum Drive: drive method for Mecanum wheeled robots. Mecanum wheels on the chassis to enable the robot to drive in any direction without first turning.
Also refer to Talon SRX for creating a RobotDrive object with Talon speed controllers.
// RobotDrive constructors
// Constructor for RobotDrive with 2 motors specified with channel numbers.
RobotDrive(int leftMotorChannel, int rightMotorChannel);

// Constructor for RobotDrive with 4 motors specified with channel numbers.
RobotDrive(int frontLeftMotor, int rearLeftMotor, int frontRightMotor, int rearRightMotor);

// Constructor for RobotDrive with 2 motors specified as SpeedController
// objects.
RobotDrive(SpeedController leftMotor, SpeedController rightMotor);

// Constructor for RobotDrive with 4 motors specified as SpeedController
// objects.
RobotDrive(SpeedController frontLeftMotor, SpeedController rearLeftMotor, SpeedController frontRightMotor, SpeedController rearRightMotor);
Driver Station
The FRC Driver Station software serves as the interface between the human operators and the robot. The software takes input from a number of sources and forwards it to the robot where the robot code can act on it to control mechanisms.
Driver Station Class
The Driver Station class has methods to access information such as the robot mode, battery voltage, alliance color and team number. The DriverStation class is constructed as a singleton by the base class.
// Get access to the methods of the DriverStation object constructed by the
// base class and store the object
DriverStation ds = DriverStation.getInstance();
ds.someMethod();

// Or call DriverStation directly when needed
DriverStation.getInstance().someMethod();
The DriverStation class also has methods for determining if the DS is connected to the robot, if the DS is connected to FMS, querying if the FPGA outputs are enabled (IsSysActive), and querying if the roboRIO is in brownout protection.
// Testing for DS Attached, FMS Attached and System status
boolean exampleBool;
exampleBool = DriverStation.getInstance().isDSAttached();
exampleBool = DriverStation.getInstance().isFMSAttached();
exampleBool = DriverStation.getInstance().isSysActive();
exampleBool = DriverStation.getInstance().isSysBrownedOut();
For compatibility purposes the robot's battery voltage can be retrieved using the DriverStation class (it is now also available from the ControllerPower class as the roboRIO input voltage). This information can be queried from the DriverStation class in order to perform voltage compensation or actively manage robot power draw by detecting battery voltage dips and shutting off or limiting non-critical mechanisms,
// Get Battery Voltage
double voltage = DriverStation.getInstance().getBatteryVoltage();
The getLocation() method of the Driver Station returns an integer indicating which station number the Driver Station is in (1-3). Note that the station that the DS and controls are located in is not typically related to the starting position of the robot so this information may be of limited use. When not connected to the FMS software this state is determined by the Team Station dropdown on the DS Operation tab.
// Get physical location of the Driver Station
int station;
station = DriverStation.getInstance().getLocation();
Operator interfaces (OI)
Different types of inputs that may be transmitted by the DS software. The most common input to is an HID compliant joystick or gamepad such as the Logitech Attack 3 or Logitech Extreme 3D Pro joysticks which have been provided in the Kit of Parts since 2009. Note that a number of devices are now available which allow custom IO to be exposed as a standard USB HID device such as the The TI Launchpad and 16 Hertz Leonardo++ included in your Kit of Parts.
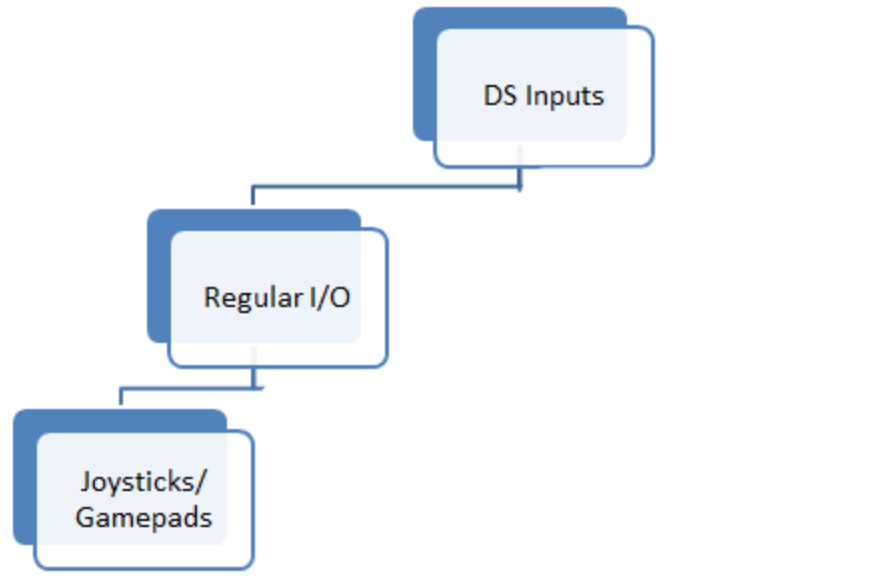
Joystick Mapping
FRC Driver Station contains indicators of the values of axes buttons and the POV that can be used to determine the mapping between physical joystick features and axis or button numbers. Simply click the joystick in the list to select it and the indicators will begin responding to the joystick input.
Sensors
The WPI Robotics Library supports the sensors that are supplied in the FRC kit of parts, as well as many commonly used sensors available to FIRST teams through industrial and hobby robotics suppliers.
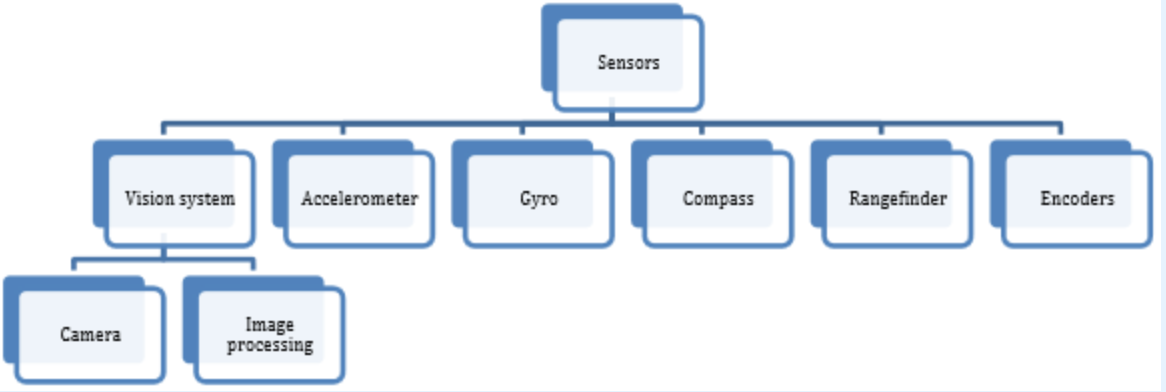
On the roboRIO, the FPGA implements all the high speed measurements through dedicated hardware. The library natively supports sensors in the categories shown below:
- Wheel/motor position measurement - Gear-tooth sensors, encoders, analog encoders, and potentiometers
- Robot orientation - Compass, gyro, accelerometer, ultrasonic rangefinder
- Generic - Pulse output counters, analog, I2C, SPI, Serial, digital input
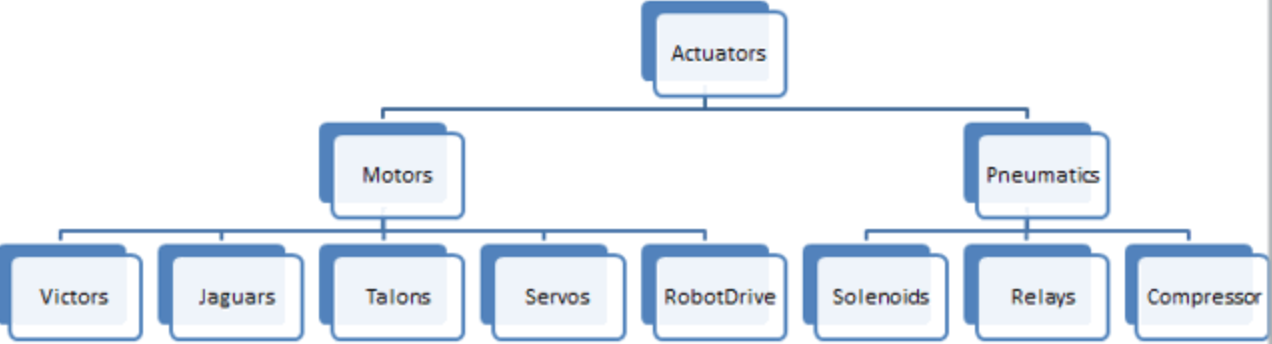
Actuators
WPILib provides support for various actuators. Also refer to Talon SRX for details on programming with Talon SRX.
Motor Safety
The purpose of the Motor Safety mechanism is the same as the purpose of a watchdog timer, to disable mechanisms which may cause harm to themselves, people or property if the code locks up and does not properly update the actuator output. Motor Safety breaks this concept out on a per actuator basis so that you can appropriately determine where it is necessary and where it is not. Examples of mechanisms that should have motor safety enabled are systems like drive trains and arms. If these systems get latched on a particular value they could cause damage to their environment or themselves. An example of a mechanism that may not need motor safety is a spinning flywheel for a shooter. If this mechanism gets latched on a particular value it will simply continue spinning until the robot is disabled. By default Motor Safety is enabled for RobotDrive objects and disabled for all other speed controllers and servos.
The Motor Safety feature operates by maintaining a timer that tracks how long it has been since the feed() method has been called for that actuator. Code in the Driver Station class initiates a comparison of these timers to the timeout values for any actuator with safety enabled every 5 received packets (100ms nominal). The set() methods of each speed controller class and the set() and setAngle() methods of the servo class call feed() to indicate that the output of the actuator has been updated.
Note that this protection mechanism is in addition to the System Watchdog which is controlled by the Network Communications code and the FPGA and will disable all actuator outputs if it does not receive a valid data packet for 125ms.
// Enabling/disabling motor safety
exampleJaguar.setSafetyEnabled(true);
exampleJaguar.setSafetyEnabled(false);
Depending on the mechanism and the structure of your program, you may wish to configure the timeout length of the motor safety (in seconds). The timeout length is configured on a per actuator basis and is not a global setting. The default (and minimum useful) value is 100ms.
// Configuring the Safety timeout (in seconds)
exampleJaguar.setExpiration(0.1);
SmartDashboard
The SmartDashboard is a Java program that will display robot data in real time. It is a useful utility to monitor robot code. See SmartDashboard documentation.
- Displays robot data and debugging information from robot code
- Displays the state of the robot program such as the currently executing commands and the status of any subsystems
- Displays buttons that you can press to activate robot commands and set system variables
- Allows you to choose startup options on the dashboard that can be read by the robot program
Test Mode and Live Mode
You may add code to your program to display values for your sensors and actuators while the robot is in Test mode. This can be selected from the Driver Station whenever the robot is not on the field. Test mode is designed to verify the correct operation of the sensors and actuators on a robot. In addition it can be used for obtaining setpoints from sensors such as potentiometers and for tuning PID loops in your code.
Network Tables
SmartDashboard uses NetworkTables for communicating values between the robot and the driver station laptop. Network Tables acts as a distributed table of name and value pairs. If a name/value pair is added to either the client (laptop) or server (robot) it is replicated to the other. If a name/value pair is deleted from, say, the robot but the SmartDashboard or OutlineViewer are still running, then when the robot is restarted, the old values will still appear in the SmartDashboard and OutlineViewer because they never stopped running and continue to have those values in their tables. When the robot restarts, those old values will be replicated to the robot.
To ensure that the SmartDashboard and OutlineViewer are showing exactly the same values, it is necessary to restart them on every single computer. That way, old values that one is holding won't get replicated to the others.
This usually isn't a problem if the program isn't constantly changing, but if the program is in development and the set of keys being added to NetworkTables is constantly changing, then it might be necessary to do the restart of everything to accurately see what is current.